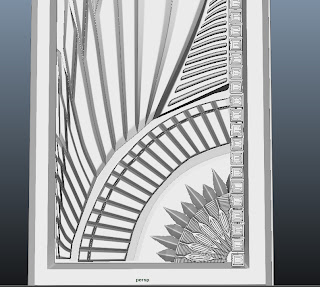
I've finally check off everything I need in order for assets to be UDK importable. I will have to remake the low poly, yet the measurements are set. I am free to use any work flow I choose if and only if I stay organized. If you're doing a vehicle that needs to be modular, then you will need to name each of the items. Let's take the Mass Effect ship for example. Each item probably had it's own file. They proborbly had to make a different scene for the galaxy map, control panel, door, etc. I have a checklist. I didn't finish it, but I got fairly far.
DONE
mbWaterChannel
mbStairs01.mb
mbStairs02.mb
mbStairs03.mb
mbStairs03.mb
mbStairs03Door.mb //Sometimes asset have to be broken up into multiple files if they are too bit.
mbSmallPillar.mb
mbGate.mb
TO DO
mbLargePillar01.mb
mbLargePillar02.mb
mbLargePillar03.mb
mbVeinsmbTrees.mb
mbOrgan.mb
After modeling with high amounts of detail, I remembered that I was on a computer at UAT. Once Maya hits 200,000, the computer is placed under high amounts of pressure. This means that you have one of two opetions under given circumstances. Divide up the object further (like I did with the stair door) or lower the amount of detail involved. Any higher and our frail system will be driven into a seizure.
At some point, a higher quality setup is needed.
But for now, use the hand you've been dealt.
This detail can be achieved in game through a new DirectX feature called Tesselation. For those of you who have heard of UDK, here is how to set it up. Please read.
http://udn.epicgames.com/Three/TessellationDX11.html
Keep in mind that Tessellation is divides the model evenly. This means that if you have a face that is 10x10 units, and another that is 20x20, the larger face will have half the polygon density. Keep in mind that Tessellation ONLY accepts the blue channel. A black and white maped with tri channel will not be ignored. The other two channels will mess it up. Tesselation also ignores scale. If you scale your model without modifying the two Lerp constant 3 vectors, you'll get something like this.


Dan the amount of detail on this is incredible, i cant even begin to fathom the unwraping process that lies ahead. this is just incredible great work.
ReplyDeleteI want to know how you made all this detail. Show me at some point please!
ReplyDeleteToo much detail, I can't even figure out what's going on with your polys you have so much detail o.0
ReplyDeleteThis is sweet Dan, thanks a lot!
ReplyDeletethe detail on your models are looking great! Keep it up!
Like others have said, nice detail. Is the pieces just a bunch of floating geometry? Tell your process please!
ReplyDeleteI can't even fathom the amount of time this gobbled up. I'm not going to critique it because this is the amount of detail I only wish I could pull off.
ReplyDelete@josh: most of it is floating geometry. A lot of pieces such as the small door and the stairs are in different files due to the amount of detail.
ReplyDelete@Josh: This was over the weekend